 No, not wang. When I started drivng home on Wednesday, I heard a tap on the passenger window, and when I looked over to see what it was, I saw myself in the side mirror. I didn’t clip anything, so I didn’t know why the mirror was folded in. Maybe someone brushed up against it in the parking lot. As I approached the four-way stop, the mirror rotated back into the normal position. WTF?! As I stated moving off the stop, it started to rotate in again. Bumps in the road made the mirror shake around. Had the pivot mechanism failed?
When I got home and touched the mirror, it swung freely. It lifted away from the base when moved upward. The only thing keeping it on was gravity and the motor control wire. Disassembly was quick and fairly simple. Remove the door upholstery panel and mirror finisher. 3 M6 bolts (10mm wrench) attach the mirror to the door window frame. The motor control wire has a connector located near the upper hinge. Remove the door speaker (if equipped) to access the connector. The mirror-side wire harness has a plastic chip that snaps into a hole in the door sheet metal. Tilting the mirror assembly outward, push in on a tab on the front of the plastic dust cover and the mirror will fall free.
Remove the plastic finisher from the bottom of the base casting. There is a slot on top of the outer edge of the base casting that gives access to the cover locking tab. Remove the M5 Phillips head screw at the bottom of the mirror motor drive unit. There is an access hole on the underside of the cosmetic cover. The mirror and motor assembly will now lift out. There are three wires going into the motor – brown, red, and black from the outside edge inward. Take note of the wire colors and pull on the heat-shrink tubing and the wire spade connectors will pull free from the motor housing. The mirror and motor assembly can now be set aside, and the wire harness can be unthreaded and set aside.
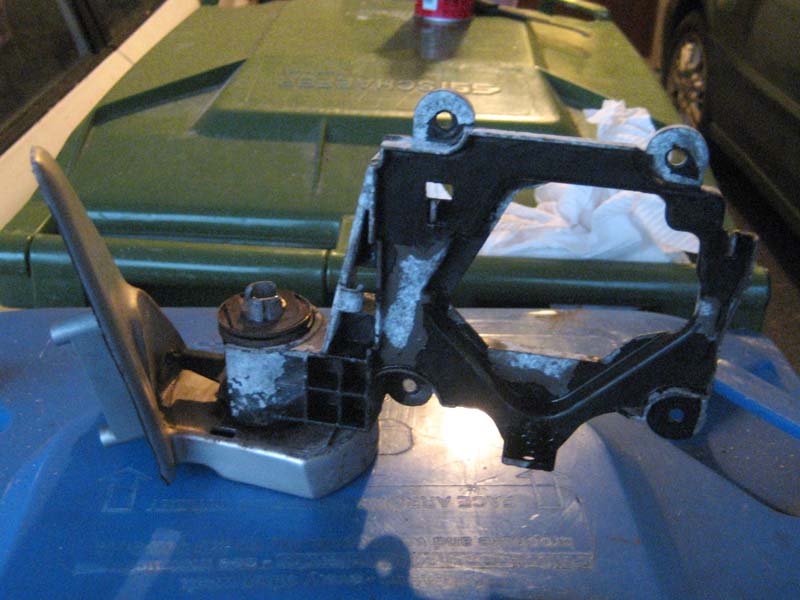
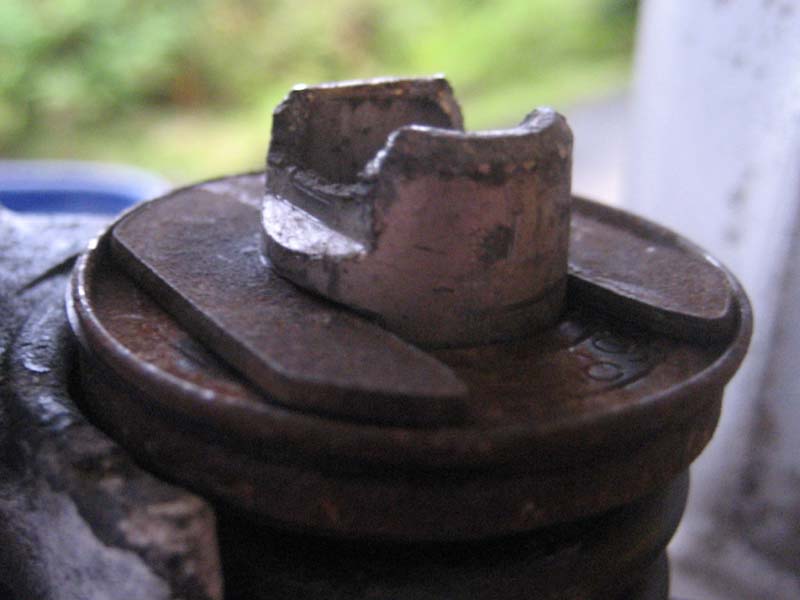
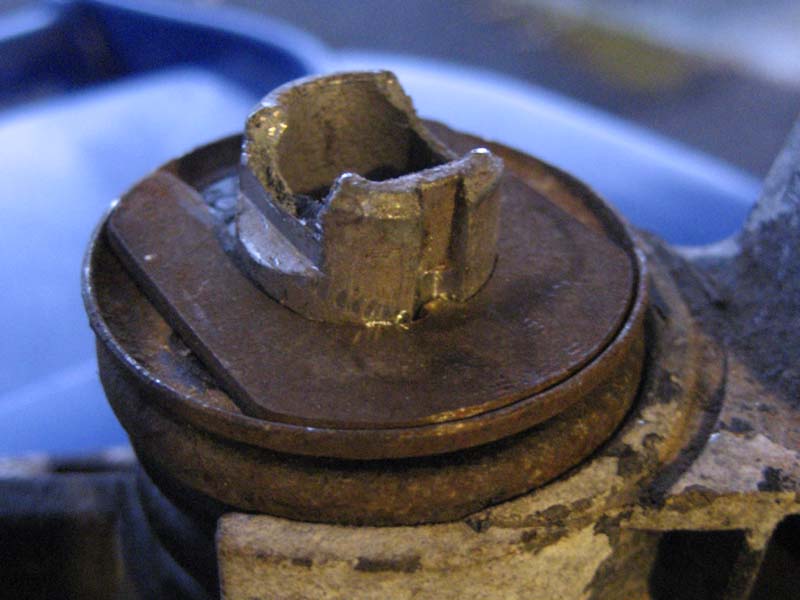
There are four Phillips-head tapping screws holding the front and perimeter mirror covers to the magnesium mirror unit frame. Remove these and a smaller screw on the normally hidden curved part of the mirror and the cover halves will come away. At this point, you will hopefully find all of the pivot tension spring parts inside the mirror body. There should be a spring, two formed sheet metal washers (one with ears, the other without) a plastic thrust bushing, and a sheet metal clip. If any of these are missing, short of the plastic bushing, you’re probably going to have to get a lot more creative. The normal mode of failure is the top of the tower of the base casting cracks off from the spring tension, allowing the clip to come off, and releasing the spring tension. To fix this, I simply recut a groove in the base casting tower for the clip using the hacksaw on my Swisstool. This new groove should be high enough that the two washers and sandwiched thrust bushing will fit with about 1.5mm of clearance below the clip. You will need the extra space since the washers are flanged.

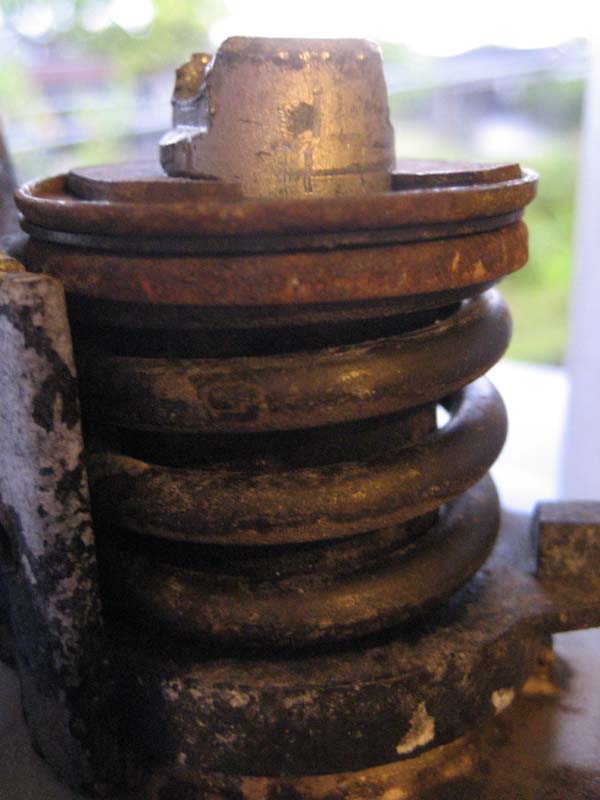 Since this would be decreasing the space for the spring by 6-8mm, cutting the spring is required. Granted, if you are a gorilla, you can probably manage to compress this extremely stiff spring and get the clip in, but the spring will probably end up coil-bound, and the increased tension will probably make the repair slots explode faster than the factory ones did. Using a Dremel reinforced cut-off wheel, I took a turn off the spring. Contour the face of the spring as flat as possible so it sits more evenly against the casting. I put the cut end down so the factory closed coil sat against the washer and bushing assembly. Everything tends to sit more squarely that way. While the Dremel is out, elongate the keyway for the tab on the throat of the clip using a cylindrical burr. Relieve the corners and edges of the new groove if possible to reduce stress risers and delay re-cracking. Test fit everything without the spring. It will be a bit challenging to get everything together while the spring is under tension, so make sure it all goes together smoothly.
I used a c-clamp, a pipe wrench and a chisel to compress the spring. The pipe wrench was there only to press on the top of the washer by the very edges so there was space to get the clip in. The chisel was set across the top of the wrench to provide something for the clamp to press against – any appropriate chunk of metal would have done the job. If there is a vise handy, use that instead of the clamp. Once the spring was preloaded, I slid the clip in and removed the clamp. I liberally sprayed the hinge, detent balls, and tension spring assembly with aerosol lithium grease and reassembled the covers, wire, and motor assembly in reverse order. After reinstalling the mirror and testing the controls, I reassembled the door panel and all was well. The mirror folded and opened correctly and held in place correctly. It seemed a little easier than before, either from cutting the spring a little too much or from the presence of grease.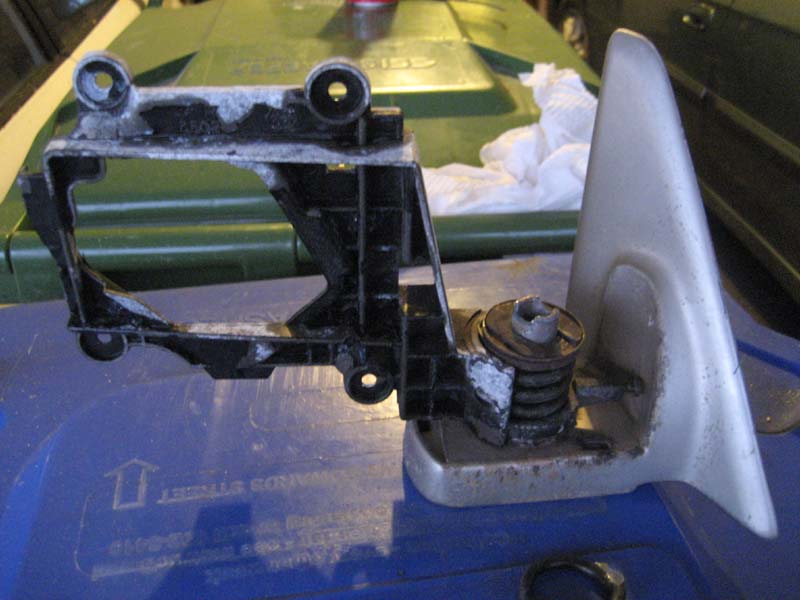
Parts: none
Tools:
Swisstool or hacksaw (a highly motivated individual can probably do this entire repair with just the Swiisstool!)
Dremel tool with reinforced cutoff wheel and 1/8” cylindrical burr
Needle files*
Clamp or vise
Large crescent or small pipe wrench
10mm socket wrench
#3 Phllips screwdriver* (door panel)
#2 Phillips screwdriver*
*included in Swisstool
Supplies:
Lithium grease
Difficulty:
Moderate to high. A certain level of skill is required to freehand cut the new slots, and a certain amount of analytical ability is required to get them in the right place.
That’s pretty good, both mirrors on the hachi are floppy, haven’t gotten around to trying to fix. Instead bought a bunch off ePay.