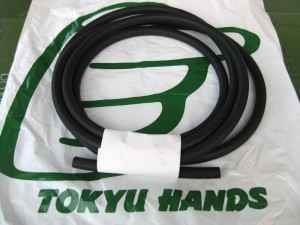
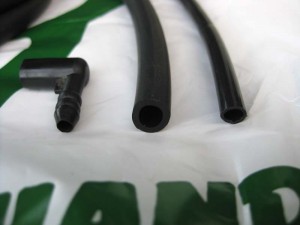
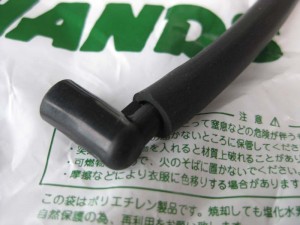
 The plastic hose that feeds the rear windscreen washer in my M Coupe turned brittle and crumbled after 11+ years of sitting on the exhaust manifold side of the engine compartment. If you’re familiar with bike stuff, it’s the same hard plastic material that Magura used for their hydraulic rim brake hose but with very thin walls. The barb fittings on the connectors were 6mm, so 7/32” vacuum hose would work, but the outside diameter was rather large. I found some black butyl rubber 6mm hose at Tokyu Hands with fairly thin walls. They also had some silicone hose, but it seemed too floppy. In particular, I was concerned that the silicone hose wouldn’t stay put on the barb fittings without some mechanical help. Two meters of the butyl tubing was 602-yen (about $8 USD at 77-yen per $1 USD). I ended up using all but around 60cm.
 When I discovered the crumbling tubing, it was so brittle, that it would crack if you simply touched it – you didn’t have to even squeeze it strongly or bend it and it would fail. At that time, I removed the old tubing and fittings and capped off the pump so the front washer would still work properly and the water wouldn’t leak out of the tank. Starting from the firewall, I removed the two nuts holding the bracket for the cylindrical canister that sits in the center of the emissions/electrical compartment so I could swing it up and out of the way and gain access to the firewall penetration. I reconnected the right angle fitting to the barb coming through the firewall. It is not absolutely necessary to remove this part when taking off the old tubing, but it makes it easier. I had to use pliers to hold the barb when pressing the fitting back onto it, because it would otherwise disappear through the grommet. After connecting the new hose, I routed it around the perimeter of the compartment then cut it off at the proper length to attach to the fitting at the front penetration of the front compartment wall.
 Taking the remainder of the hose, I connected it to the fitting at the pump and ran the tubing around the front underside of the tank and up along the wiring. I couldn’t quite fit the new tubing in the channel molded into the tank, since the new tubing has a larger OD than the original tubing. Working backwards, I routed the tubing through the plastic retainers then trimmed it off at the proper length to attach to the other end of the compartment fitting. I reinstalled the canister and tested the system.
On cranking the pump, the water flowed strongly for a moment but went dry. I checked the engine compartment and the hose had popped off the right angle connector at the firewall penetration. I ended up zip-tying the connections at the two right-angle fittings (the other one is at the pump), since those have very short barb fittings. The connections at the fitting at the emissions/electrical box were tight and leak-free, so I didn’t zip tie those. The hoses held on the next test.
Parts required:
2 meters (6-feet) of 6mm (7/32”) ID tubing
2 small zip ties
Tools required:
Large flat screwdriver (to remove plastic button retainer on washer tank)
13mm socket, socket wrench, and 6” extension (to remove emissions canister to gain access to the tubing junction at the firewall)
Bungee or string (to hold emissions canister out of the way when working on the tubing)
Small pliers (to break old tubing bits off the barb fittings, and to hold the connector at the firewall when reinstalling the right angle adaptor)
Sharp scissors or utility knife and scrap board (to cut hose to length, and to trim zip tie ends)
Difficulty – somewhat easy. It’s just connecting tubing to existing fittings, but you have to remove some ancillary componenets to get at the tubing junctions.
Time – about an hour or two for removing the old hose and installing the new hose.
0 Responses to “BMW M Coupe Rear Washer Hose Repair”