 OK, back at the begining of September (9/11!) I first met the seller of the latest FX16 and took a look at it. My initial inspection revealed some things. While clean, it was rougher than the advertised pictures revealed. It was actually a month later, prodded by the insane amount of fun rally-cross was, that I actually bought it. In the month since then there have been more revelations.
Archive for the 'car' Category
Page 22 of 39
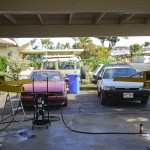 So both posts of the MaxJax are leveled and bolted down. Proceeded to hook up the electric hydro pump and start filling the resivour for the called for 9 quarts. Somewhere past 7 it overflows and I have a little mini spill. Not too bad, but I realize the 9 quarts must account for the volume in the cylinders and lines too so I plug in the pump and hit the power button. There’s a reassuring whine from the electric pump, no movement, but I can hear gurgling of fluid when I stop the pump. Just needs to get that fluid through everything, and running the pump some more the platforms finally start moving, and do some boingy action. Must be the air in the system. The fluid in resivour indeed has gone down, so I add fluid to top things off. It’s moving slow so I figure I should add the extension arms for some added weight and load to aid in bleeding the air. So I hit the release lever. I’m intent on watching the platforms lower and neglect to notice the growing oil puddle that has formed on the floor around the base of the pump. What I didn’t realize was with the air was taking up volume so too much fluid was returning to the resivour and backing out the fill cap. Oops, doing my own little BP here! Run to frantically scatter newspaper around to soak it up. Continue reading ‘Root’s Speed Shop-We Have Lifto!’
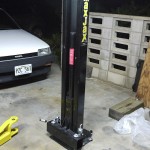 After two evenings of one hour grinding each with a air die grinder, I finally got the second post bolted down. Have yet to fill up the oil and fire it up yet, but the mounts for both posts are in now!
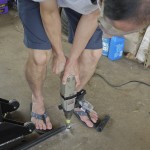 In the course of the week, I found some conrete anchors in stainless steel that will work. Drop in style which are shallower, but I needed to go up a size to somewhat match the weight holding capacity. Saturday Derek came over to resume this project and we proceeded to drill out the first hole to the larger size needed.
 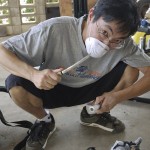 And here I am being the epoxy ninja cutting a portion of this epoxy Tootsie roll putty to plug up the bottom of the hole we drilled all the way through. Some tacky and stinky stuff. The first anchor goes in and we pound it home. After this is in we drill the other four holes. Concrete dust makes a very effective clogging agent that quickly plugs up my shop vac, but aside from this things go pretty well. Going with the upsized anchors and bolts, there now is very little room for error, but it looks like we got it right and one pilar is finally secured. Continue reading ‘Root’s Speed Shop-Half Speed’
OK, everyone tease me some more, yes I think I now have all the operational Corolla FX’s on Oahu. If not, I have the majority stake. Yes, I bought yet another just a few hours ago. It was actually brought to my attention by more than one person from different forums on the net. I guess in the online world I’m also the FX Guy. It’s a regular FX16, so it doesn’t have all the bells and whistles, but mechanically its got everything that counts, so that makes it the race candidate. And that is the plan, to become the rally-x machine! It’s in stock class, but is stripped down so is the lightest version. One of the major selling points on this most recent FX is that it has working A/C, so I think that maybe be stripped out and find its way into my current daily driver FX16 GTS. However I don’t think the newest FX member is not going to be ready for the next rally cross, which is in two weeks. On the drive home I detected some issues. There is a brake pulsation, which the previous owner told me about and included new rotors and pads he had bought but never installed. Aside from that there were some problems that I noticed on the longer drive home. There was an engine stumble that became really noticeable when pressed and the RPMs approached mid-range. There also is some kind of suspension issue, feels like the rear right side. Possibly the strut is blown. In steady state the car feels fine, but when a bump is hit the car wallows and acts odd. I’ll have to take care of these before its race ready. But at least it doesn’t have under dash neon, steering wheel bolted on with wiggly lamp shade spacers, fancy rims held on with two threads, or the various other hacks of the previous two FX16’s.
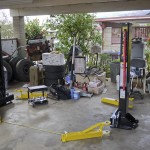 Update, last Sunday Fabio came over with impact drill and bits and we laid out the lift and started to drill the mounting. There was some delays as we went back and forth to the store to get various bits (literally) that we’d realized we would need. The pilot hole actually went fairly easily, but when suddenly I heard a change in the sound I got a little concerned and started poking around. It turns out that with the short 6″ bit we had already drilled through the conrete slab and hit aggregate. The slab was right at 4″, and looking at the provided anchors and the spec documents, this was not going to work. Calls around to the home improvment stores open on Sunday did not come up with any anchors we could use.
 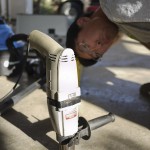 Denied! So we will have to try again this weekend, with larger but shallower anchors. We’ll see how it goes!
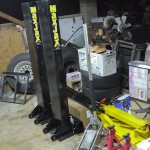
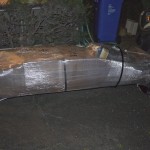 It’s here! Waiting in the driveway when I got home was this mysterious looking plastic wrapped bundle. The newest toy to add to the “shop” was delivered today, less than four weeks after I ordered it, nice! So what is it? My very own two post hydaulic automotive lift. It’s a 6,000 lb capacity mid rise lift from Danmar called the Maxjax and it’s selling point being mid-rise is that it does not require a high ceiling, most standard residential concrete floor will meet its requirements, and the other point is it’s “portable”. At 800+ pounds, you probably won’t want to pack it into your car to take to your buddies for a weekend project, but what it means is it can easily be broken down into smaller parts and the posts can unbolt from the floor and be wheeled away into a corner to be stored, leaving the garage space fully open after your done.
 Little Inyou here came out to check it out too. Haven’t quite decided on that name for kitty, but I think it’s works for her black and whiteness. Inyou is yin-yang.
Anyway, after dinner I set out to unpack it. I wasn’t sure about moving all these hunks of steel by myself, but I didn’t want to leave it out in the open. With judicious use of my car jack and my favorite SGI rollie plate, I was able to unpack everything and move it into the garage with minimal strain. Happy with that! I think it would be advisable to use steel toe shoes as parts did come clanging down a few times pretty close to my toes, but I avoided any injuries.
After almost 20-years of service, the motor of the driver’s door window regulator gave up the ghost. It still worked sometimes if you knocked it around, but the operation was halting, indicating the brushes had been ground down to their wear limit. I took the door apart and removed the regulator to make sure of this, and indeed, when the motor housing was removed, the brushes were bottomed out: The flexible, braided conductors connecting the brushes to the external power wires run through slots in the sides of the brush channels, so when these reached the bottoms of the slots, the brushes were held away from the commutator, and conductivity was lost. There was no “evil intent” on the motor subcontractor’s part to make the motor have a limited lifetime – the location of the braided conductors on the side of the brush was to keep the top of the brush clear for the brush springs. Continue reading ‘FJ80 Power Window Regulator Motor Swap’
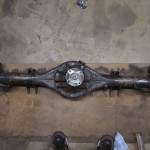 I like a tight rear end. I picked up my diff and axle housing from Pacfic Automotive on Friday. Ken was still working on the axle bearings, and was going at it with an air chisel when I went to his shop. I’m glad I left this job to him. I’m sure I would have been cursing at that point, & my rickety mystery China hydraulic press would prob be in dangerous shape and no longer a parallelogram. When I got it back home, I repainted it with my favorite kryptonite paint, POR-15. Thats the stuff I used on my control arms where I forgot to press a metal sleeve out of and we had to torch the end to heat it to extract it. The paint was intact and pretty unscathed even after that. It’s name is Paint Over Rust meaning you can paint it over surface rust. The surface does need to be clean of oil, I can never seem to get it totally clean of that, I have some spots where the paint didn’t stick. But if the paint sticks, look out! If you get any on your skin, that’s it. If you don’t immediately wipe it off, it’s there until the layer of skin peels off. Painting implements are pretty much toast afterward. Its not cheap stuff, buy only what you can use, once you open the can any left over is pretty much toast. They advise you to use some kind of scoop to take paint out of can, you get it on the lid lip and when you close the can, its toast. It’ll seal up the can tight and you’ll end up destroying the can reopening it. If you keep it clean, you can extend storage a bit by sealing it tight and in another container with dessicant, this paint is moisture cured. Oh well, I made a mess of things so this entire $30 pint goes for painting the rear axle. Continue reading ‘Tight Rear, Loose Rear’
