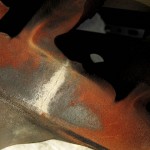
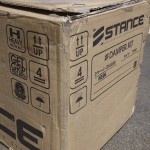
 So whats the status of the AE86 Corolla? I’ve actually been driving it, kidney bouncingly it every day. Here’s the story behind that. Last I mentioned the AE86, I believe it was running and autocrossing. Was having rear end traction issues, so it was in my plan to work on the suspension. Debating piecing together a cut and weld kind of arrangement, but found a complete coilover system just released from Stance. The rear is not really a coilover, but is still adjustable. That was ordered, along with a complete Prothane polyurethane bushing kit. Suspension was taken apart, old bushings removed, cleaned up,
 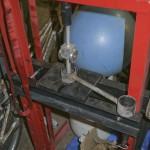 and repainted with POR-15. That POR-15 is tenacious stuff, even taking a torch to a piece we needed to extract a metal bushing from didn’t mess up that paint much. The rickety mystery Chine hydraulic press once again came into use. Got the job done, but it doesn’t instill much confidence! The bushing replacement was pretty straighforward and easy. Only the rear panhard presented some challange as it had metal bushing/sleeve that needed to be extracted, and one side had a wasp waist single piece bushing that required the press, liberal lubrication, and some worrisome looks at how much the bushing was squishing and squirming jamming it into place. Continue reading ‘Auto Progress – AE86’
Tag Archive for 'AE86'
OK, most of my Toyota’s are pretty good about this, but some designer/engineer was napping when they designed the clutch master cylinder in the AE86 Corolla. After all the engine and tranny work the past weeks, discovered the hydraulics were quite crusty and leaking. 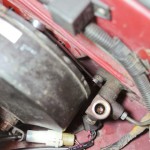 It was something I was intending to address from way back, but finally got the parts. So I figured this was going to be a quick and easy job, on the FX if you were motivated could be done in an hour. Not so here. For some reason someone at Toyota decided to put one mounting stud into the engine bay, behind the brake booster. In order to squeeze in a wrench and move it, you need to unbolt the brake booster from inside the foorwell. In order to gain easy access to those bolts, you need to remove some dash trim and drop the steering assembly. Sheesh. It’s done now, and then I discovered the clutch slave I bought is the wrong one, looks like its for the SR5 4AC model that has the slave mounted on the opposite side of the bell housing! Nuts! Looks like I’m not going to make the event this Sunday.
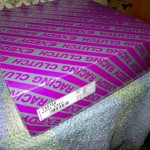 then it’s worth overdoing. This past friday I picked up my Exedy Hyper Single clutch kit, part #TH01SD (note that it is speced for later 4AGE so does not include the pilot bearing). Since I have the engine and tranny completely out of the red Corolla, figured might as well change out the clutch. And since this is supposed to be my weekend fun and race car, why not go for something a bit more uprated. I have what Exedy considers their “Stage 1” Sport clutch in the FX right now and with the lighter OEM last gen 20 valve flywheel it’s pretty nice and I kill the engine only a couple times a week. What the heck, skip Stage 2 and go right for “Stage 3”. A set with a lightweight chromoly flywheel, forged aluminum clutch cover, and 6 puck cerametalic friction pads. Flywheel is about 9 lbs compared to the original stock of 16. Cover, pressure pad assembly is a pound or so lighter. We shall see how dramatically different this feels. Continue reading ‘If It’s Worth Doing…’
Sunday! Sunday! Sunday! It’s SCCA Test and Tune day at the stadium! A day for all the SCCA geeks (and geekettes) to bring their cars out and drive them all day on the course. The weather was clear, and hot. I see many a lobstered racer tonight! It was a full house for the entire day, so turnover was kinda slow, sometimes almost 30 minutes between runs, but it was enough time to weight my car, and get in about 7 runs. Enough to start to get a feel for the car, get the tire pressures sorted, discover that this Corolla is fun, and get an unexpected kustom tuning job. Continue reading ‘Test n Tune, Shake n Bake’
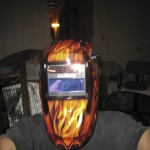
So tonight was my second attempt at fixing the crack in the AE86 exhaust manifold. Being only a welding monkey, MIG was easy, but going back to the big old school buzz box stick welder was a bit harder. It takes a bit more skill to strike the arc and keep the stick at good spacing. What I was trying to fix is the all to common crack in the stock cast iron manifold for these Corollas. This lets nice buzz packing fumes go where they’re not wanted, like the front of the car! On Sunday (after wrestling with getting one last nut off on Saturday) I had my first attempt at welding the crack. I had to monkey around with the welder, get used to the blinking on and off of the helmet, and try not to get the stick stuck to the manifold. Continue reading ‘Welding Monkey’
The AE86 Corolla has a cracked manifold (like almost every other stock one) and it was causing me to catch some buzz when I drove it around last Saturday. So I decided to attempt to weld the hunk of cast iron. I’d done it before for practice on a different cracked manifold, and it’ll be a good test of the new fancy electro helmet! First things first, I have to take it out. No problem, I figured, having done it number of times with the FX. Pulled out the trusty can of Kroil and gave all the nuts and bolts a good squirt. Fzzzt…. Ooops, there goes the last of the propelant. Oh yeah, RWD layout is different. Fortunately they all are pretty loose (although makes me wonder about others), except one nut on the backside of the manifold to downpipe junction. It’s a long stud so requires a deep socket, but is angled in such a way that the socket can’t fit on it. WTF? Toyota is usually pretty good about not designing things like this. And there is too much stuff all round to fit a open end in. Eventually undoing all the rest, wiggling things around, I barely fit a wrench in there, and again it’s loose so after much contorting get it out. Took much longer than expected, too late to grind and weld, oh well, guess I’ll have a beer. Prob gonna have to disconnect the steering shaft when I reinstall, what a PIA.
The AE86 lives again! To sum up, couple weeks ago, decided I better get off my duff and get the AE86 Corolla running and safety checked. I had ordered a complete new set of shiny rotors and performance brake pads because although it had passed safety, the brakes have been scary weak from the moment I picked it up. So I got those changed out and feeling pretty good, when I discovered the water pump had sprung a leak. Ran into some difficulties with that in that the new replacement part was too tight a fit, but I eventually got that together. So I thought all was good. I rushed over to the 76 station by my house, to later be informed that the car did not pass. One high beam was out, the horn didn’t work, and they didn’t like the bubbling tint on the driver rear quarter. Continue reading ‘It Lives II’
Ok, looks like I have to apologize to Italy, almost. That water pump for the AE86 installed last night is correct, almost. I mic’ed it along with the new Japan one I picked up and the shaft measures the same. Must be Italian metric, just a hair too big. Taking a file to it, coating it with oil, and it finally went on. I sure hope it doesn’t become a problem to remove in the futur
(0)